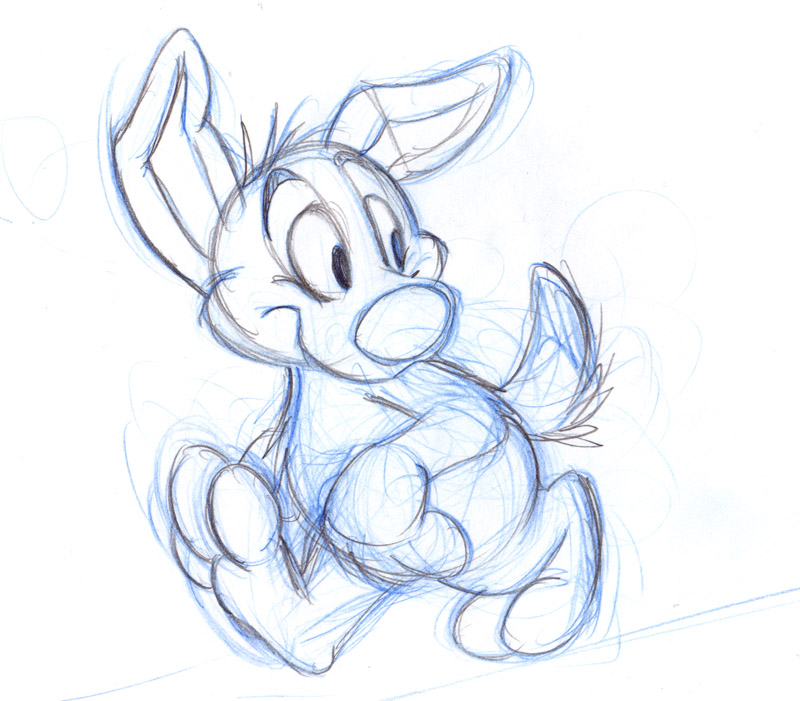
During the last lesson of 'Adobe Illustrator for Beginners', the trainer wants us to practice drawing our a character, which can help us in our final project. He teaches us how to draw a dog for this practice session. We first get the picture of the dog from http://www.ohnitsch.net/wordpress/wp-content/uploads/2010/12/101024_dog_sketch.jpg.
Personally, I have difficulty sketching the outline of this dog using the pen tool as there are visible lines which are not meant to be sketched out. I did a bit of adjustment after the trainer give comments on my sketching. After adding the gradients, I finally get the picture of my dog.
Showing posts with label Practice. Show all posts
19 February 2011
16 February 2011
Adobe Photoshop Practice (Baby)
During my last lesson of 'Adobe Photoshop for Beginners', I learnt a very simple yet important technique that is 'liquify'. This technique allows one to make something bigger or smaller, and is especially useful when trying to get the 'right' body shape. For this practice, I try to make the baby's eyes looks bigger.
31 January 2011
Adobe Illustrator Practice (Camera)
During the third lesson for 'Adobe Illustrator for Beginners', we were tasked to draw out a DSLR camera. This practice helps me get a rough idea of how to pick the right gradients.
26 January 2011
Adobe Photoshop Practice (David Beckham)
During the second lesson of 'Adobe Photoshop for Beginners', we learn how to combine two different photos together, and using several effects that is available in the Adobe Photoshop. I would like to share the final outcome of this practice.
After going through it myself, I realised that it is not hard to place a fake tattoo in a photo. It does not require much step for me to get the outcome below.
This second piece is my personal favourite. I did not expect to be able to come out with this kind of picture. This picture requires a lot more steps to accomplish.
After going through it myself, I realised that it is not hard to place a fake tattoo in a photo. It does not require much step for me to get the outcome below.
![]() | |||
| New Tattoo |
![]() |
| Cat Eyes |
19 January 2011
Adobe Photoshop Practice (Spiderman)
Recently, I went for the 'Adobe Photoshop for Beginners' workshop. Using the pen tool to crop and clone stamp to fix unwanted images in the background, I tried merging my face with spiderman's body. The head looks slightly magnified. I was thinking if I had magnified it further, I could make it look like a baby spiderman. Nevertheless, when I posted this picture to Facebook, it makes my friends laugh.
![]() |
| Me In Spiderman's Suit |
17 January 2011
Adobe Illustrator Practice (Portrait)
I wanted to make a cartoon of myself using Adobe Illustrator. Using the skills taught in the Adobe Illustrator for beginners workshop, I began by tracing out the profile of my face using the pen tool. I use thinner lines for details such as my nose and ear. The outcome can be seen below.
I move on by adding colours to the picture. I face a problem whereby I could not add colours to specific parts as there are many incomplete paths in my tracing although all the lines seems to be connected to each other. I end up having to trace again to complete the path. Finally, I manage to add in colours to the picture. I use the eyedropper tool to help me get a suitable colour for the lips and face.
For a beginner, I am satisfied with the outcome of the cartoon. Given more time, I hope to improve on the gradient for the eyes and add more gradients to the face.
![]() |
| Tracing Out the Face |
![]() |
| Adding Gradients to the Face |
![]() |
| Comparison between the Original and Edited Photo |
13 January 2011
Adobe Illustrator Practice (Apple)
I went for the first lesson of 'Adobe Illustrator for Beginners'. I am very excited as this is the first time I am learning how to use Adobe Illustrator. ![]() |
| Original Photo |
![]() |
Lesson 1: Tracing Out the Apple |
![]() |
| Lesson 2: Experimenting with Gradient |
![]() |
| Lesson 3: Completing Different Path Lines to Create Distinct Parts of the Apple |
![]() |
| Lesson 4: Adding Colours to Different Parts of the Apple |
Subscribe to:
Posts (Atom)